
Review of a special setup for extreme macro photography
In this article, I’ll detail my macro setup for photographing minerals. This information applies specifically to using a Nikon D5600 + Thorlabs itl200 + Mitutoyo 10x. I’ll write about using other equipment later.
What this setup is capable of ⁉️
With this setup I can photograph very small mineral details with a horizontal field of view from about 2 to 3 mm, depending on the bellows extension. The final image is created from hundreds of frames using focus stacking, because at this magnification a single photo has almost no depth of field. ✨
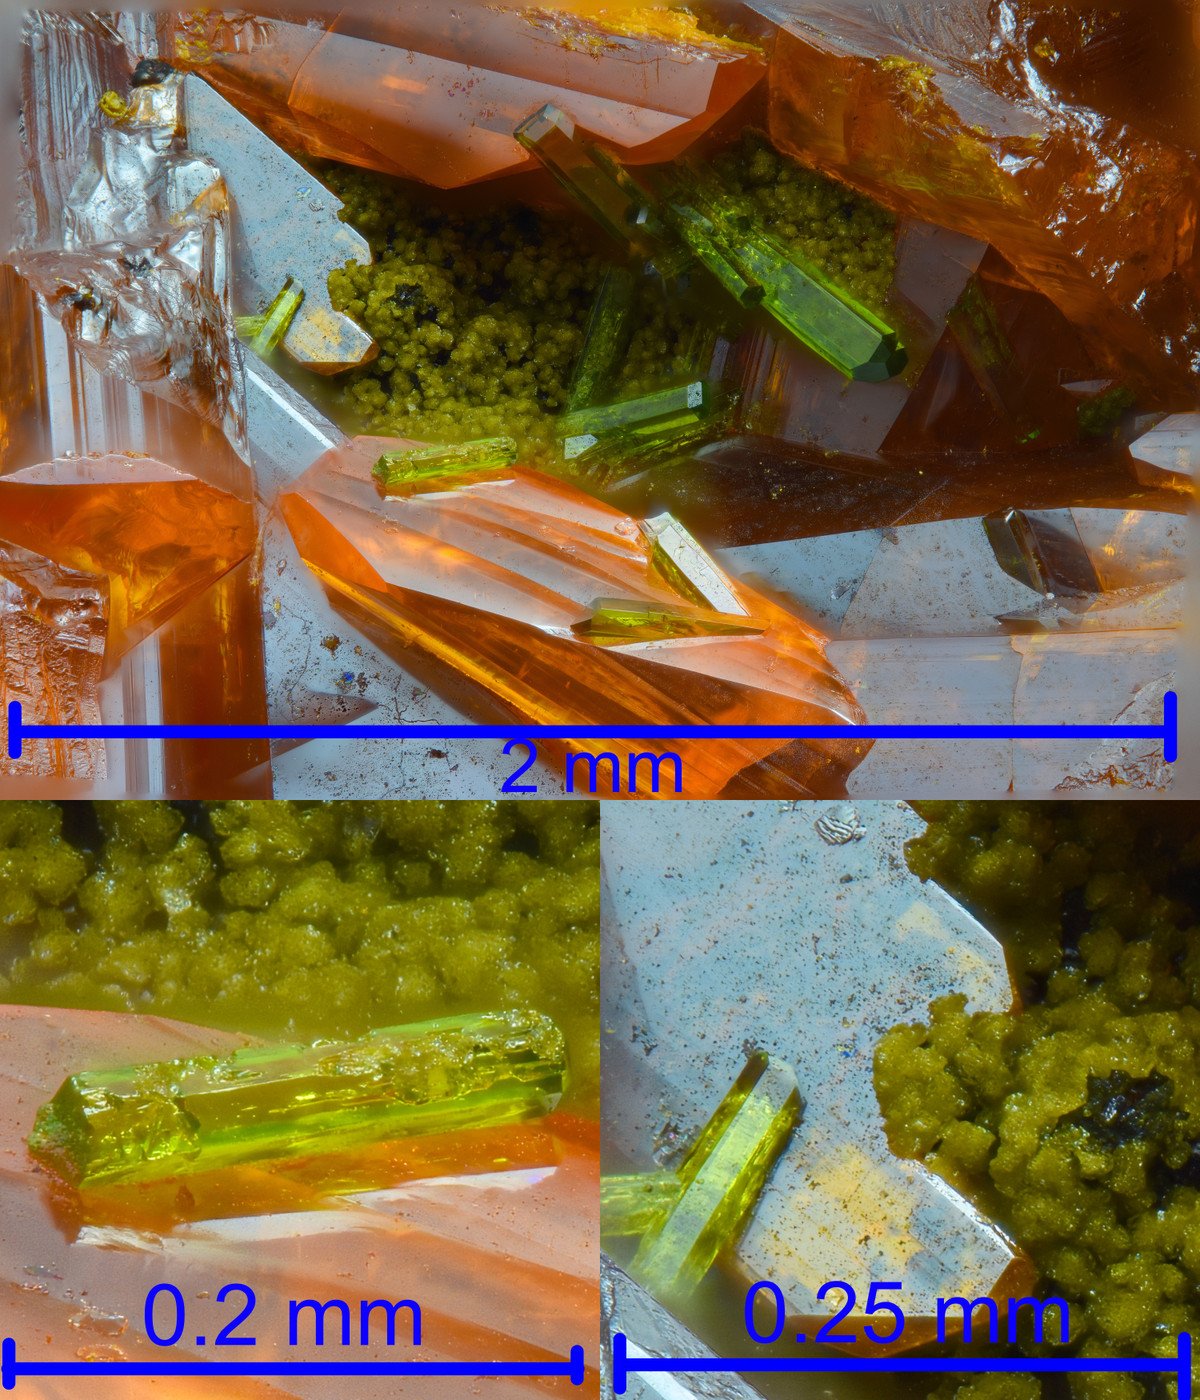
— What makes extreme macro photography different —
Macro photography of minerals is very different from regular photography. At high magnifications, the depth of field becomes extremely shallow, requiring specialized stacking software, which combines focused areas into a single image. The main goal of the setup is to obtain the most detailed images of the crystals. For this type of photography, I use a setup I built myself; there are no ready-made products for this type of photography. Also, the lenses I use are those used in industry for a wide variety of purposes, meaning they’re not available in a regular camera store. However, I also use a variety of materials, such as plastic plates and yogurt containers, to diffuse the light.
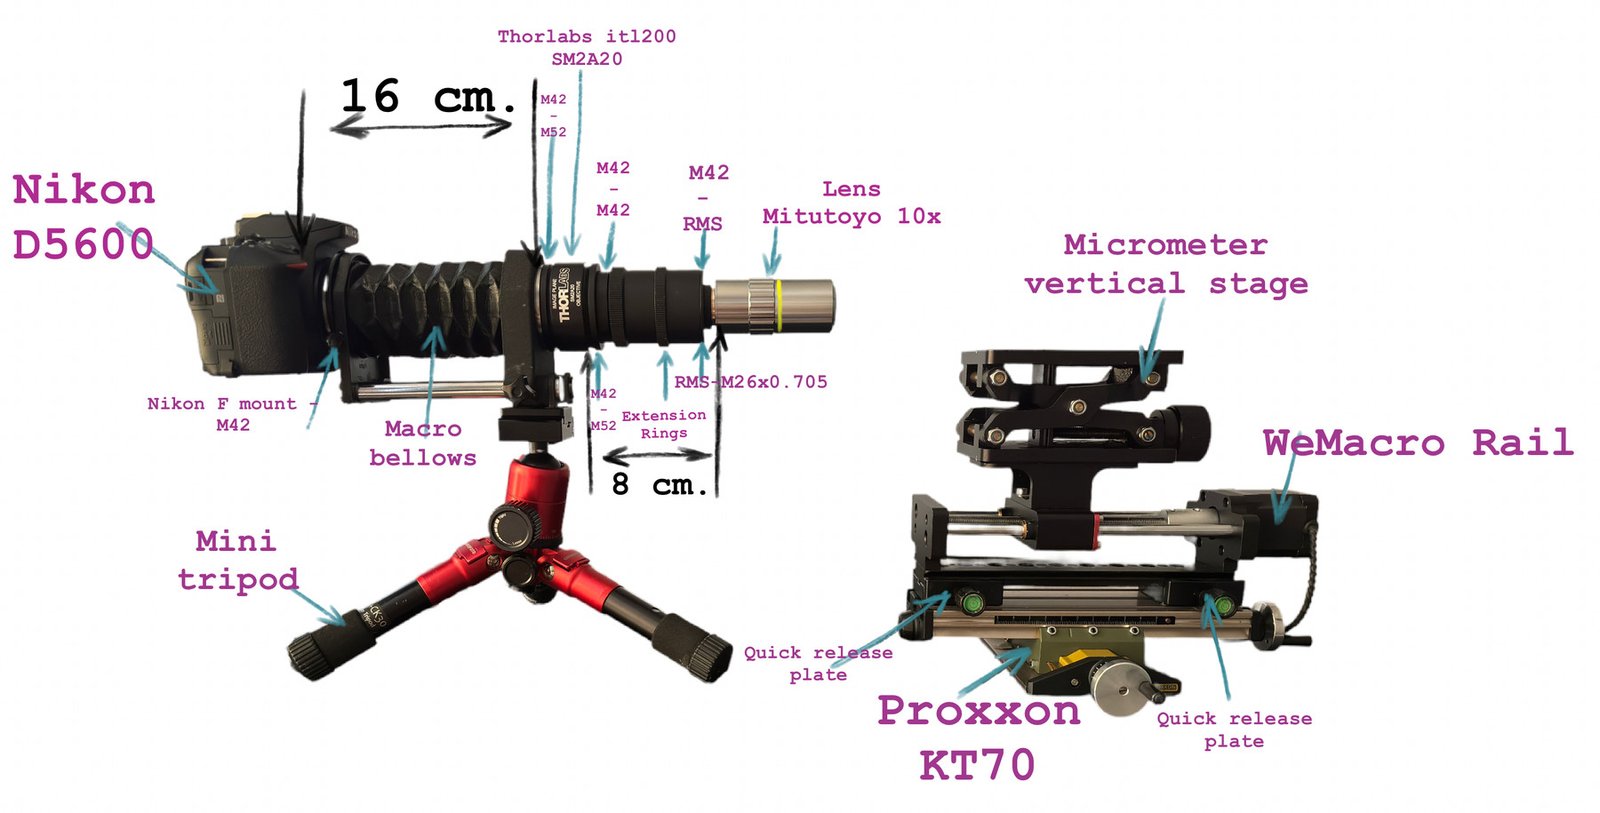
Main components of the setup
Camera: Nikon D5600
Tube lens: Thorlabs ITL200
Microscope objective: Mitutoyo M Plan Apo 10x
Focusing rail: WeMacro
Positioning table: Proxxon KT70
Camera extension: macro bellows
Additional extension: macro rings
Software for stacking: Affinity Photo / Zerene Stacker / Helicon Focus
Final editing: Pixelmator Pro
📷Camera: Nikon D5600 —
I use a Nikon D5600 for shooting.
It has a 24MP CMOS sensor with no optical low-pass filter (OLPF) and a 6000x4000 pixel resolution. That’s pretty much all you need to know about this camera, as all other specifications are completely irrelevant for this type of shooting. The only other, and very important, feature I’d like to highlight is the shutter-release delay feature. This means that after the camera takes a photo, the mirror doesn’t drop immediately, but only after a delay. This prevents vibration from the shutter, resulting in a blur-free image. Without this feature, all shots would be blurry due to shutter vibration. If you use mirrorless cameras, this problem shouldn’t exist at all. I suspect that even some DSLRs won’t produce vibration, but it depends on the model and manufacturer; you’ll need to experiment to figure it out.
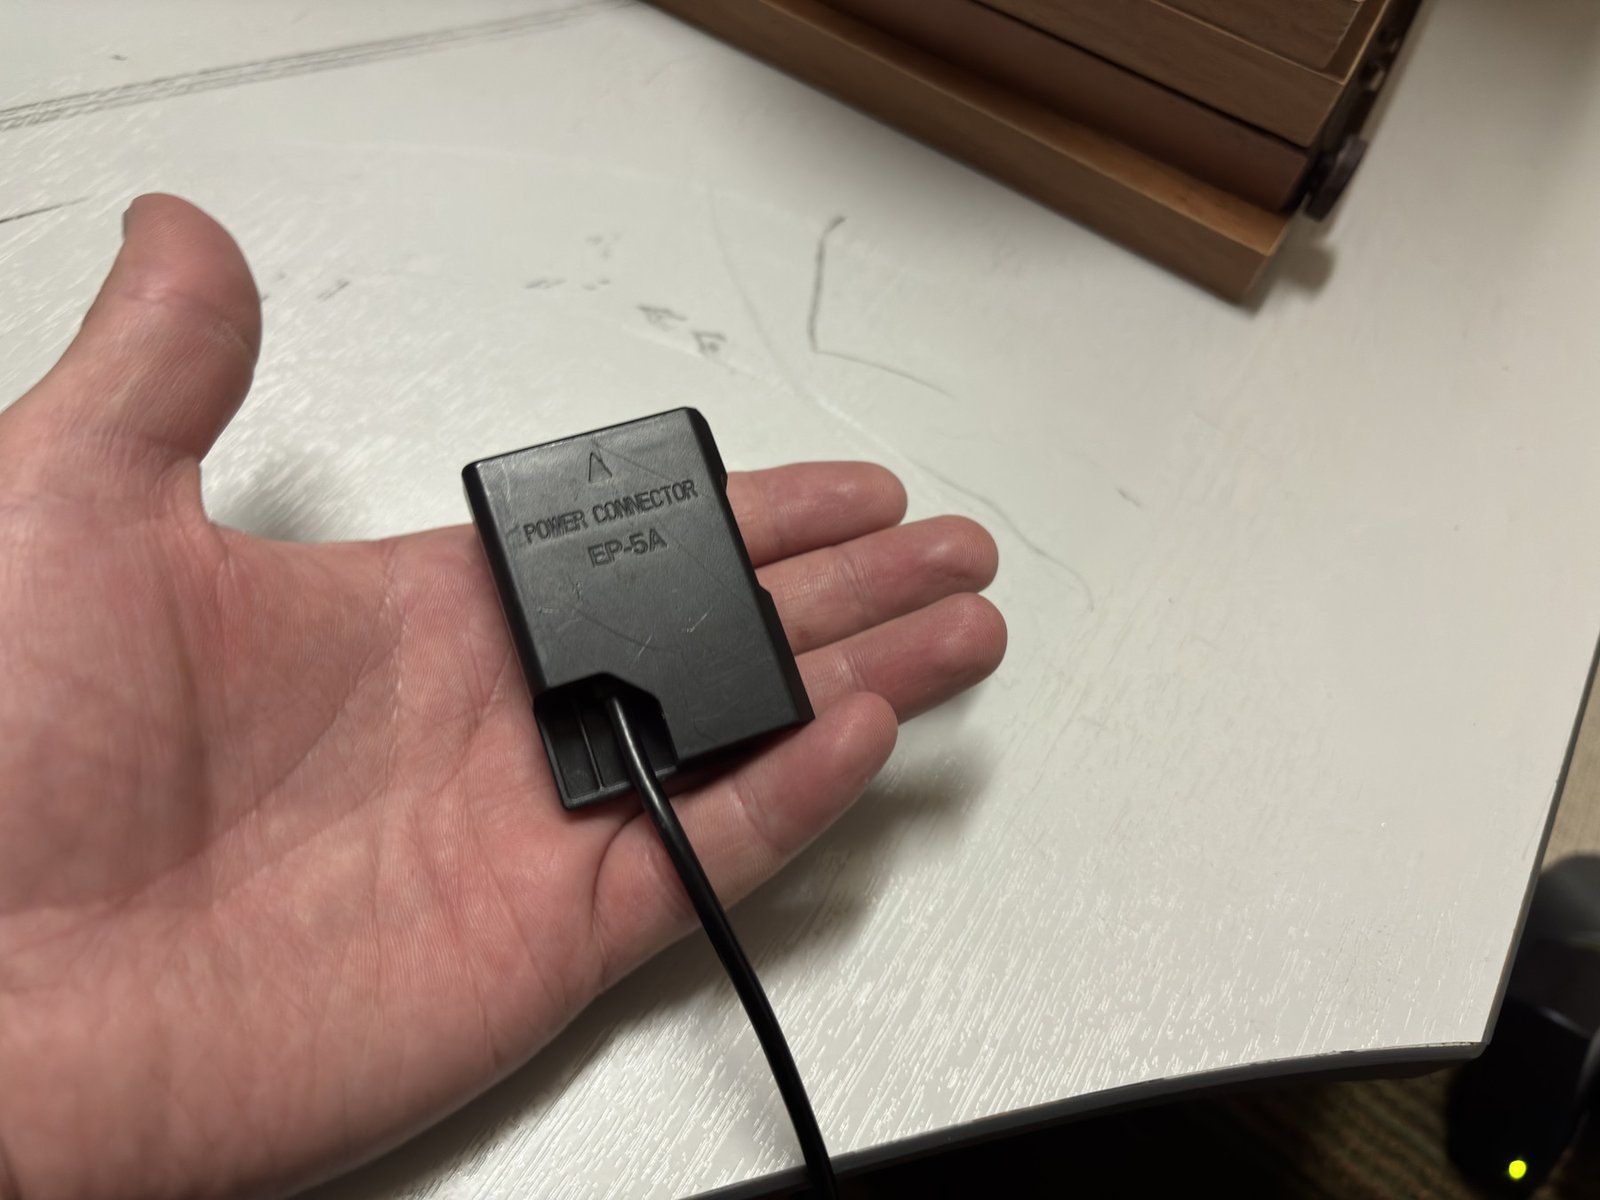
I don’t use batteries when shooting, but connect them directly to the power supply via USB via an adapter. If you shoot with batteries, a single charge won’t be enough for 800 shots, which is typically how many shots you get when shooting a single mineral. You also need to consider the specifications of the power supply; if its specifications don’t match the camera’s, it will constantly disconnect or experience shutter errors.
— Macro bellows and sensor-to-tube-lens distance
Next, the Nikon D5600 is connected to the macro bellows via an adapter. I don’t know the model or manufacturer, but I remember they were old German macro bellows. I use these because they’re a perfect size for the lens itself, specifically the working distance of the lens that attaches to the macro bellows.
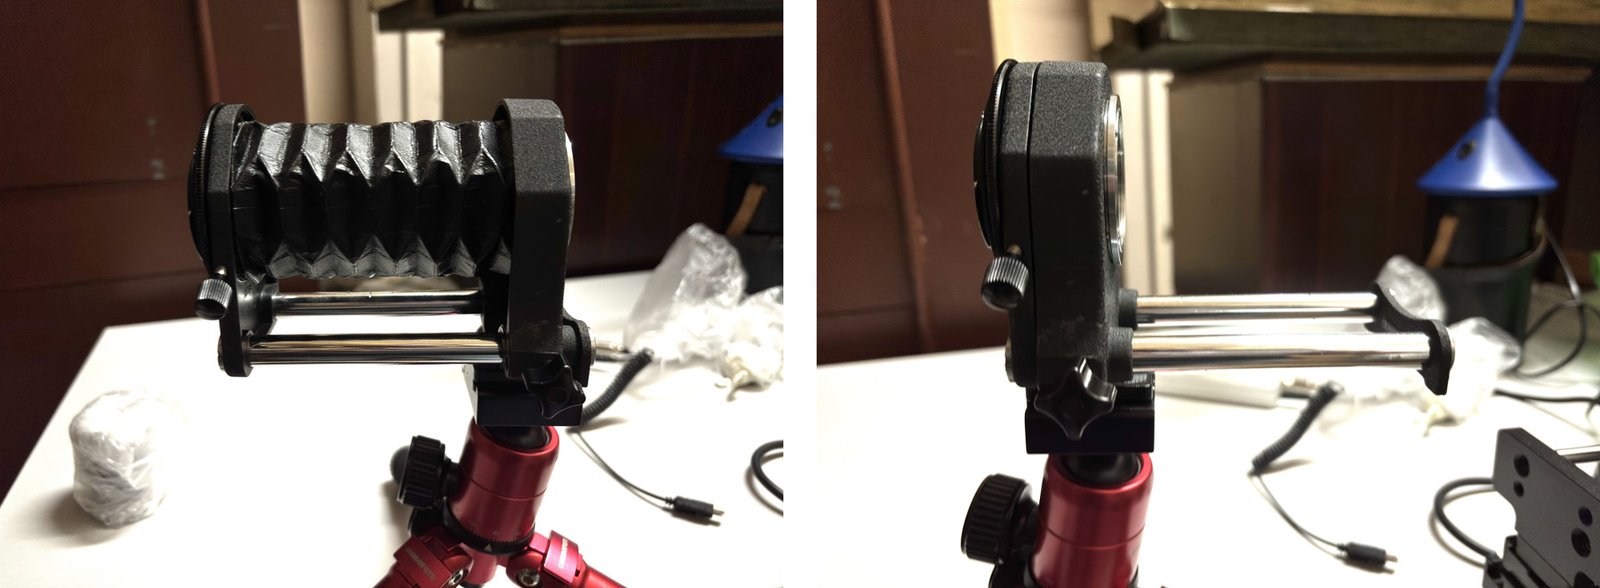
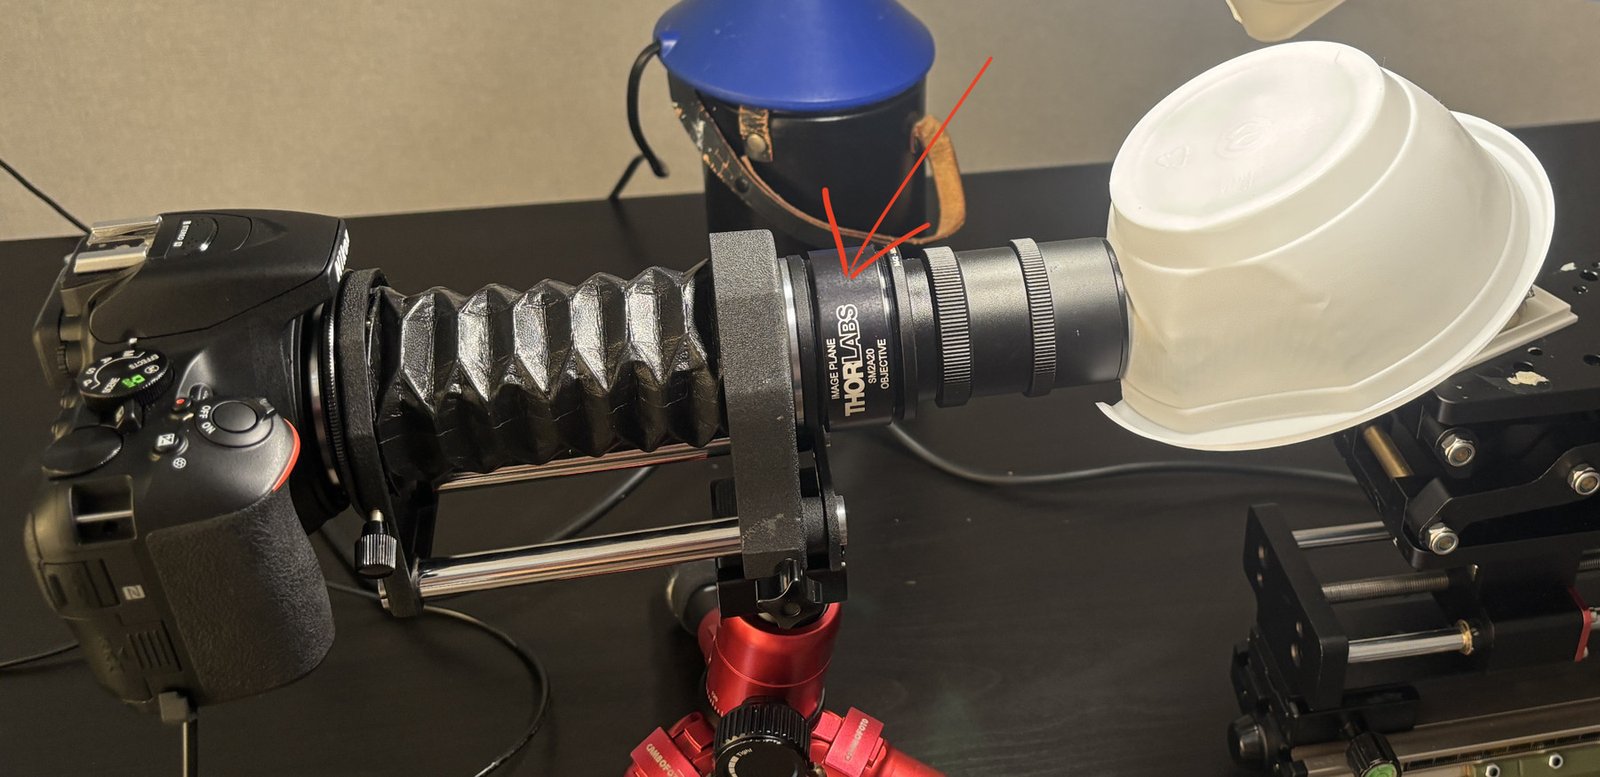
You can also adjust the macro bellows’ distance, allowing you to zoom in or out. The greater the distance from the camera sensor to the lens (ITL200), the greater the magnification. With the macro bellows extended, the horizontal frame size is approximately 2 mm, and if you fully retract the macro bellows, the horizontal frame size is approximately 3 mm, without degrading the image quality. As you can see in the first image in the article, the distance from the sensor to the ITL200 is 16 cm, although the manufacturer states its working distance is 14.8 cm. The 16 cm I use is the maximum that provides pixel-by-pixel detail. Increasing the distance will, of course, result in greater magnification, but the detail will be very poor, making such magnification pointless.
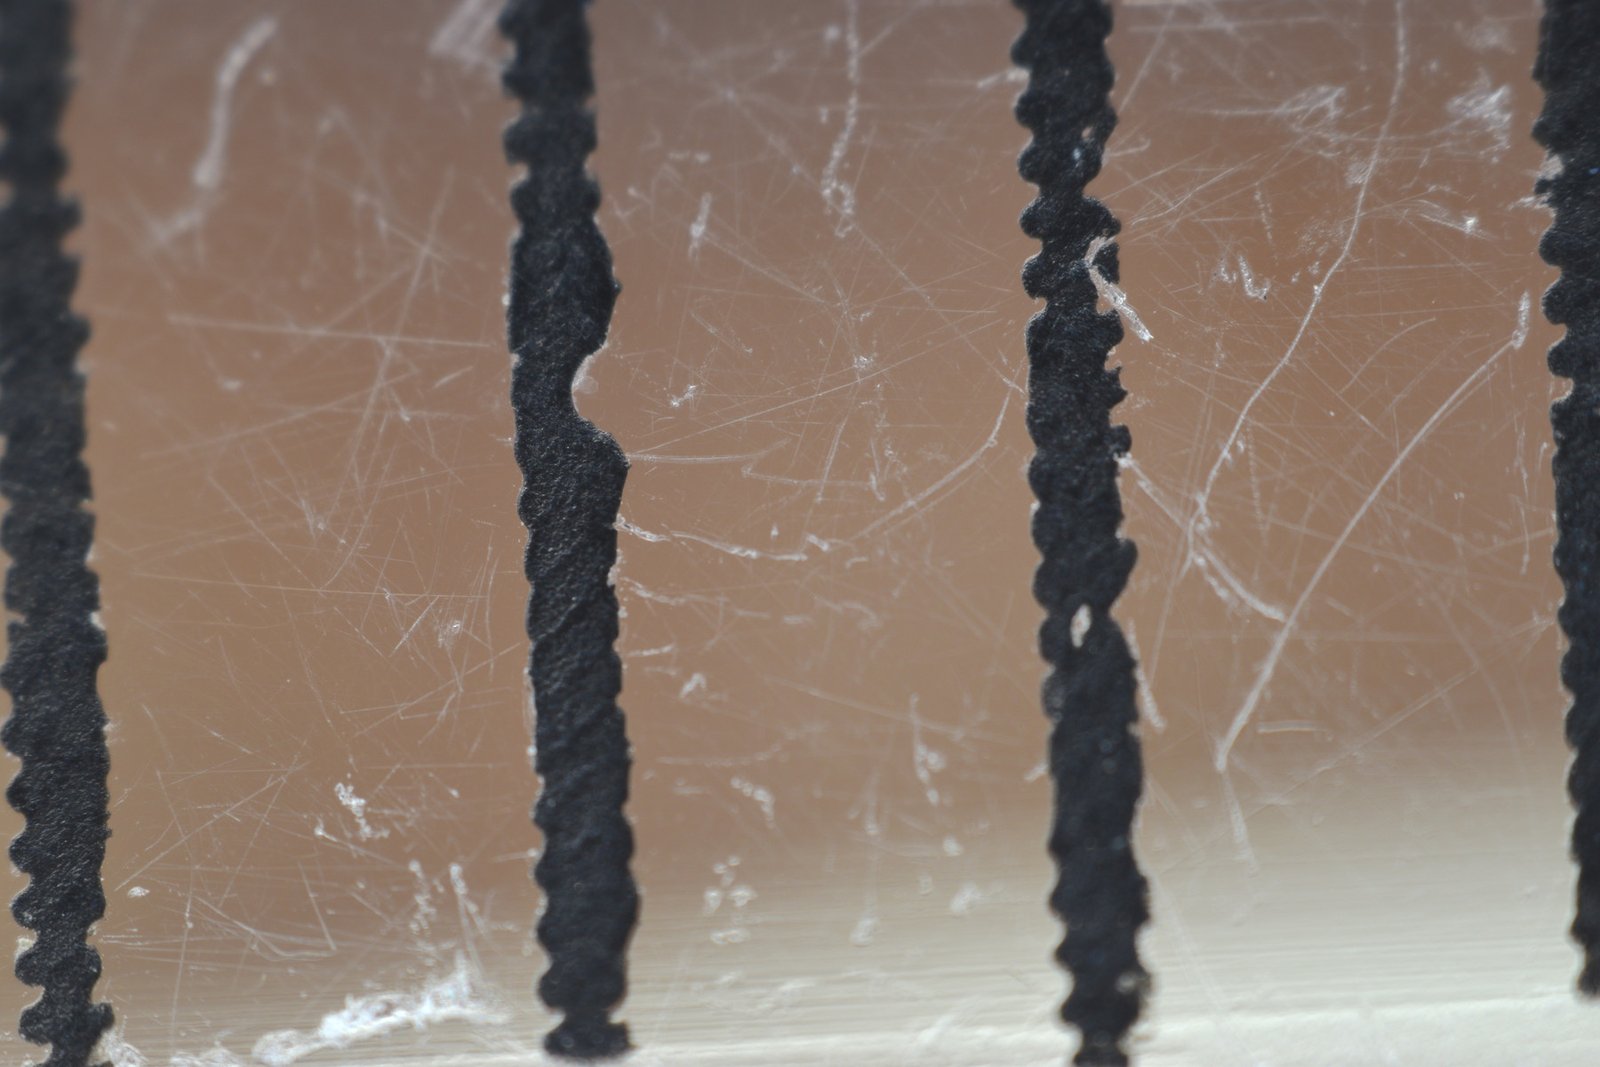
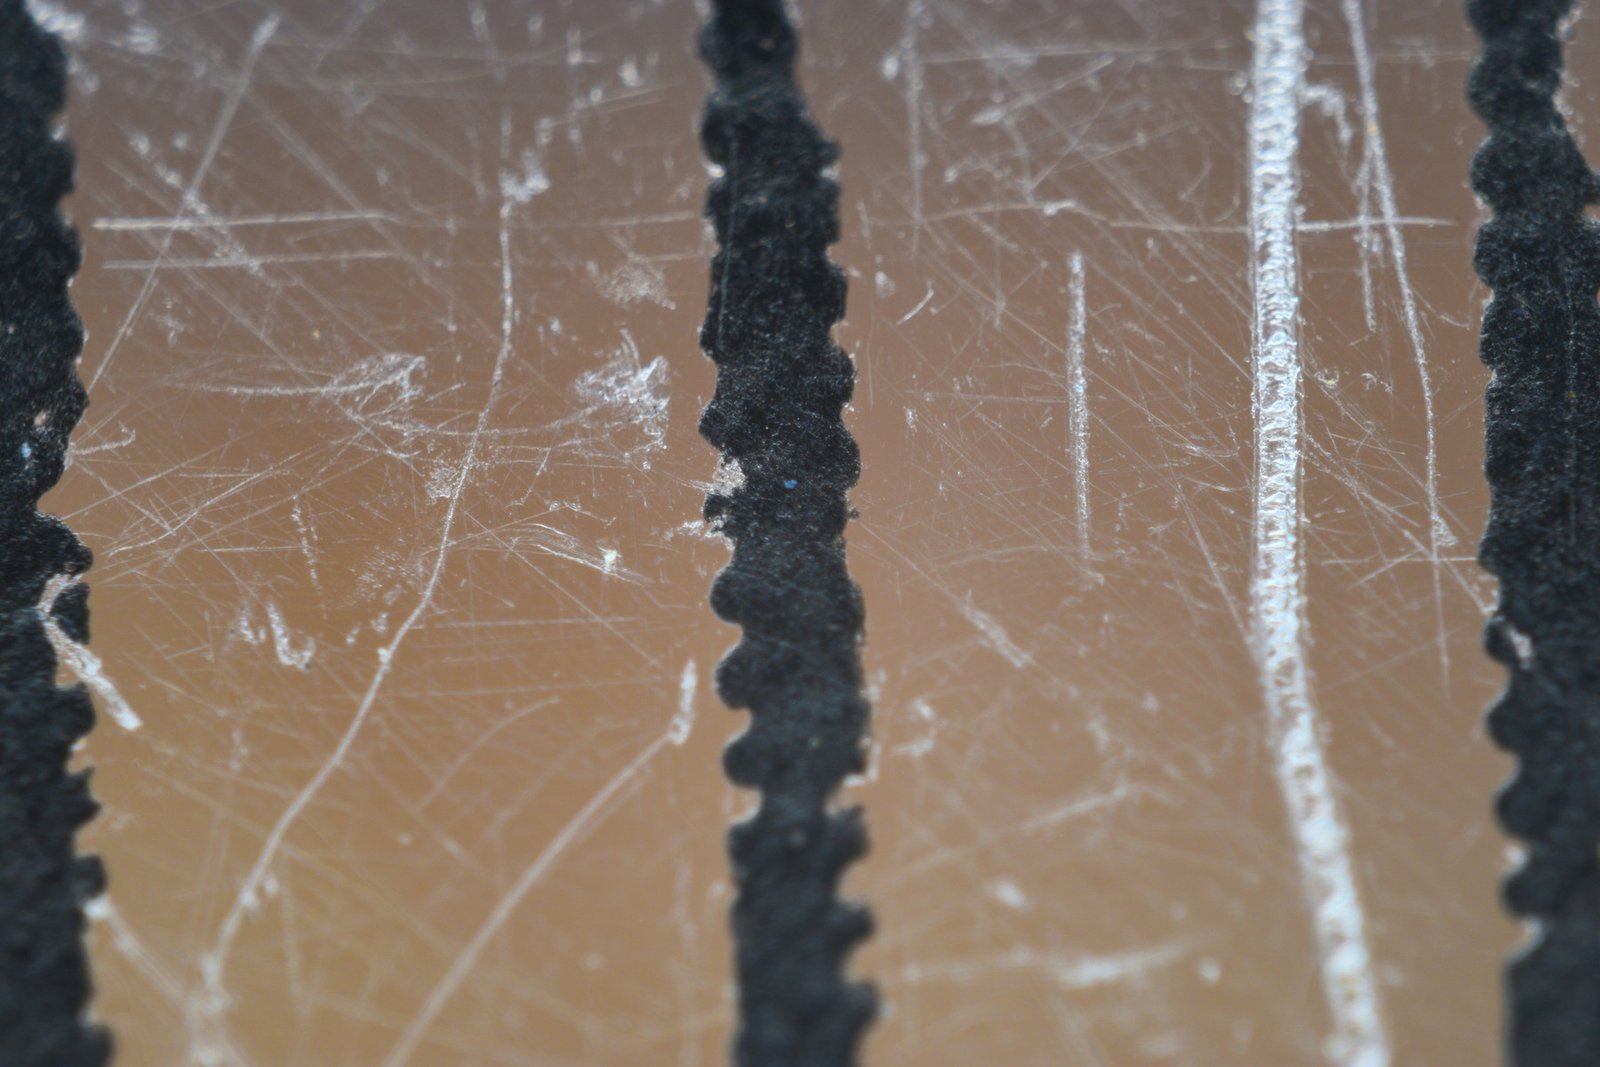
Field of view with my setup:
Bellows extended: about 2 mm horizontally Bellows retracted: about 3 mm horizontally
This allows me to change the magnification without changing the microscope objective.
Why do I use macro bellows instead of macro rings? Using macro rings results in the center of the frame appearing slightly overexposed, creating a white, circular spot. This is because the light is reflected in the rings, creating this effect. Unfortunately, I don’t have any photos left to show you this effect.
— Tube lens: Thorlabs ITL200 —
Next, the Thorlabs itl200 objective lens is attached to the macro bellows via the SM2A20 adapter. This is a tube lens for infinity-corrected microscope objectives. The focal length is 200 mm and the working distance is 14.8 cm. The lens itself has a thread on only one side and cannot be used without the SM2A20 adapter. This lens is one of the best for macro photography when paired with the Mitutoyo.
Optical path of the system:
Nikon D5600 sensor → macro bellows → Thorlabs ITL200 → extension tubes → Mitutoyo 10x → subject
In my setup, the distance from the camera sensor to the ITL200 is about 16 cm. The official working distance for the ITL200 is about 14.8 cm, but in my case 16 cm gives the best balance between magnification and pixel-level detail.
— Extension tubes after the ITL200 —
Next, macro rings are attached to the itl200, with a total spacing of 8 cm. Using macro rings in this case is acceptable; their use does not create the overexposure effect I mentioned earlier.
— Microscope objective: Mitutoyo M Plan Apo 10x —
Next, the Mitutoyo 10x M Plan Apo objective lens is attached to the macro rings. Mitutoyo lenses are among the best microscope objectives, producing stunning results. This lens has a working distance of 34 mm, which is excellent, allowing you to take images even in cavities and voids in rocks. Simpler lenses have a very short working distance, literally a few mm, which makes photographing minerals difficult, and often impossible. They also produce very strong chromatic aberrations, unlike the Mitutoyo.
— Adapters —
Regarding adapters. As you can see in the image, you need to use multiple adapters to connect all the parts. Some of them can be purchased on AliExpress, but for more specific ones that aren’t listed there, you’ll need to purchase them from rafcamera.com you’ll definitely find the adapter you need there.
— About the matte surfaces of the system —
You should pay attention to whether there are any reflective surfaces inside the setup that aren’t matte or black. Reflective surfaces can significantly affect the quality of the photo. My setup had reflective elements, so I covered them first with regular black marker paint and then with a clear matte varnish. Some people use a special Japanese black, very matte paint, and it’s really very matte and very very black, but it’s also very, very expensive.
— Motorized macro rail and positioning system —
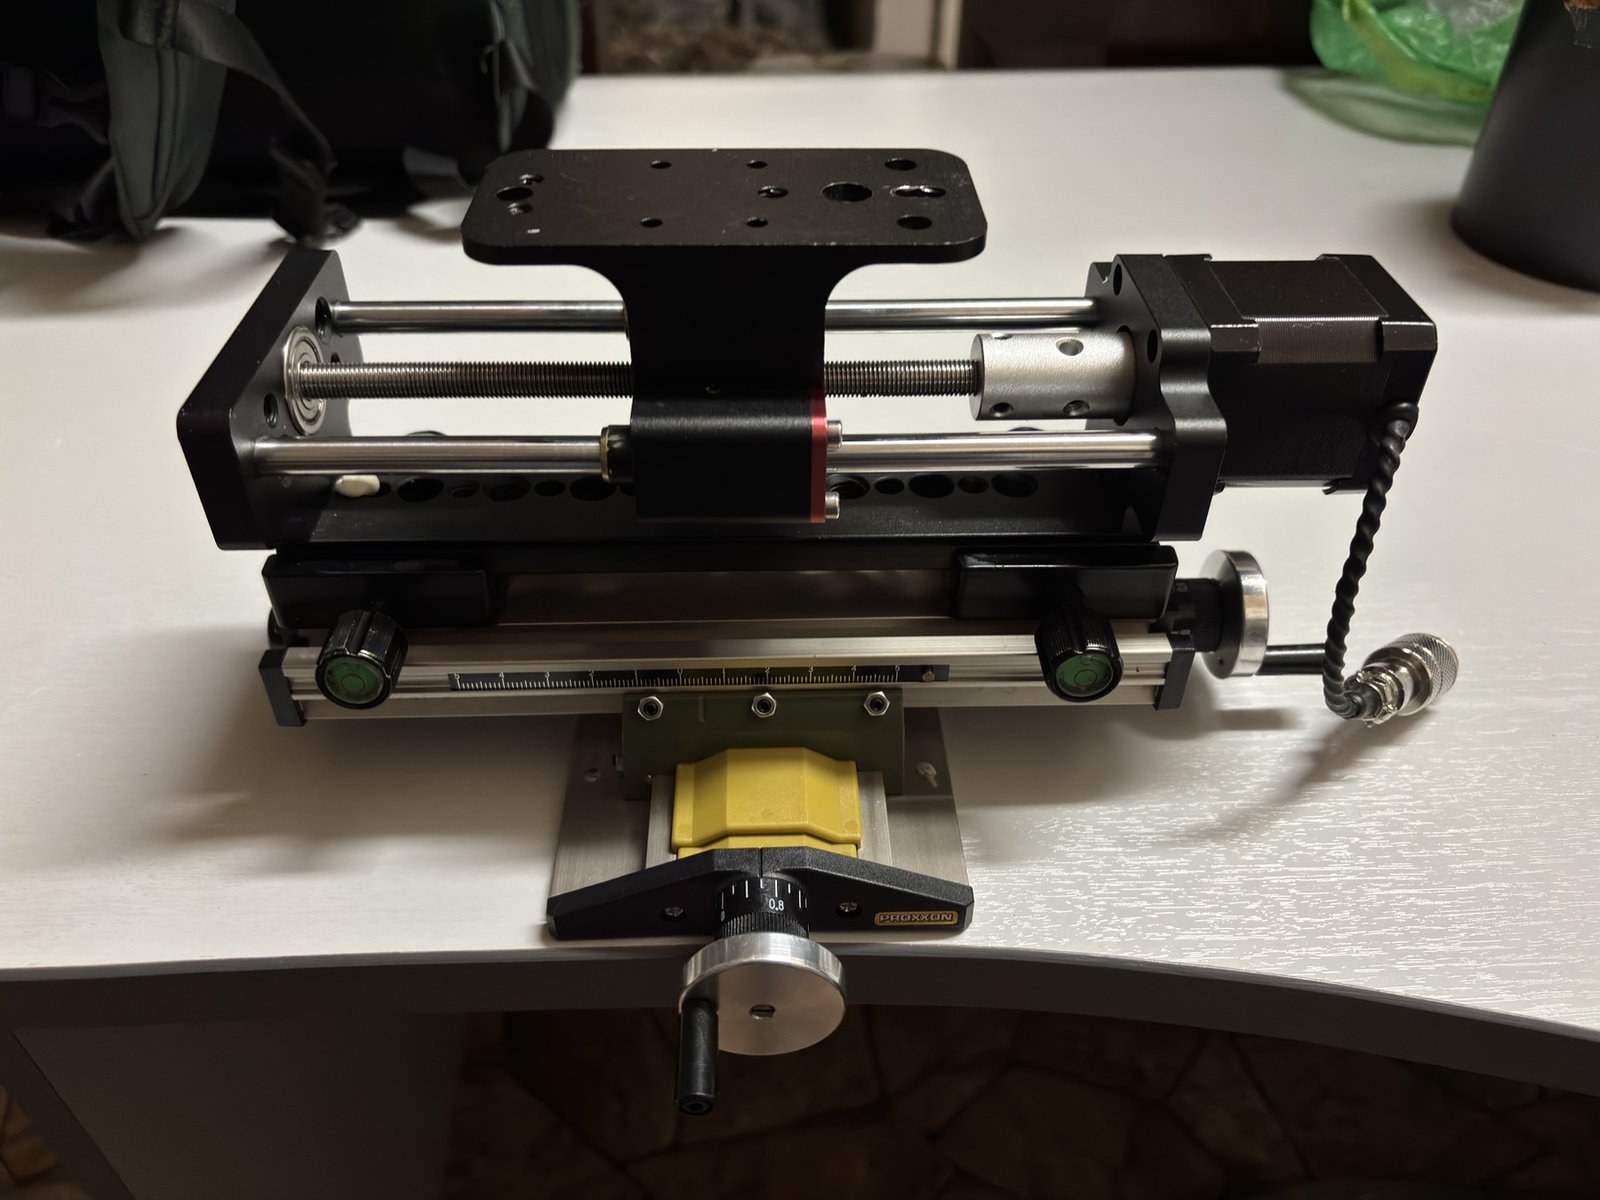
A macro rail is a device for very precise camera or subject movement during macro photography. In my case, it’s the subject that moves. The macro rail moves the subject a preset distance, as if taking multiple shots of the subject with varying depths of field. This allows focus stacking to capture the entire image with greater depth of field.
I use Wemacro macro rails, which I bought back in 2016. Overall, they’re very good. I used budget rails from another manufacturer, but they would shift wildly when moving, making it difficult to take photos. Wemacro can be controlled from a PC via USB or via Bluetooth via mobile devices; I use the latter.
WeMacro Settings
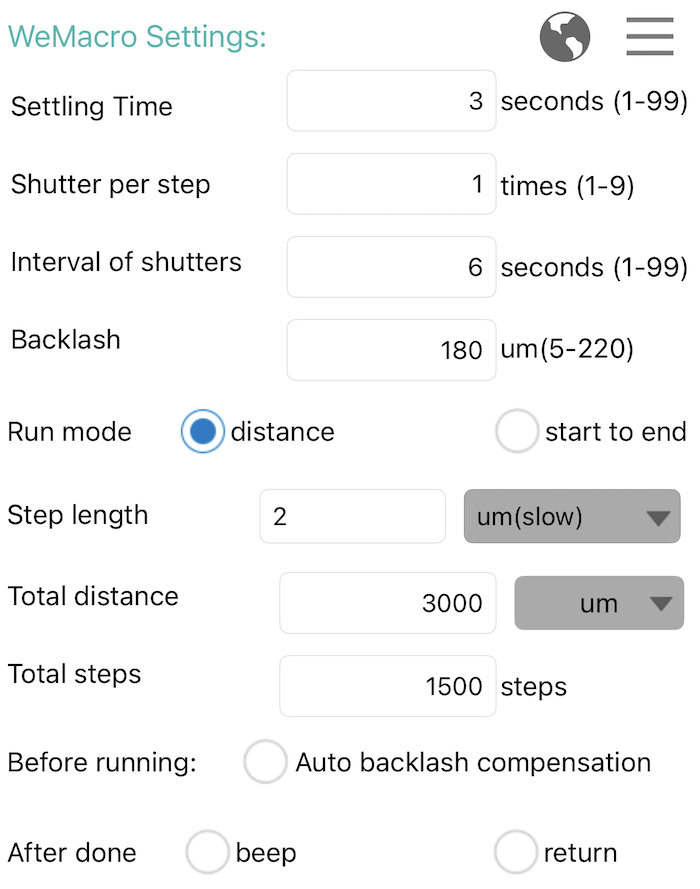
Main WeMacro settings I use:
Settling Time - waiting time after each movement, needed to reduce vibration.
Shutter per step - number of photos taken at each step. I usually use 1. Interval of shutters - pause between shutter releases.
Backlash - mechanical play compensation.
Step length - distance between frames. For 10x I use 2 µm.
Total distance - full travel distance for the stack.
Total steps - number of steps/images in the series.
How it works?
The shooting range is selected
The step is adjusted
The rail moves in small steps
At each step, the camera takes a photo
The result is a series of photos for focus stacking
The Wemacro rail is mounted on a Proxxon KT70, allowing for forward-backward and left-right positioning to find the perfect composition. Despite the high magnification, the adjustment is very smooth, allowing for precise movement. The Proxxon KT70 is connected to the rail with a quick release plate, ensuring a stable and robust design.
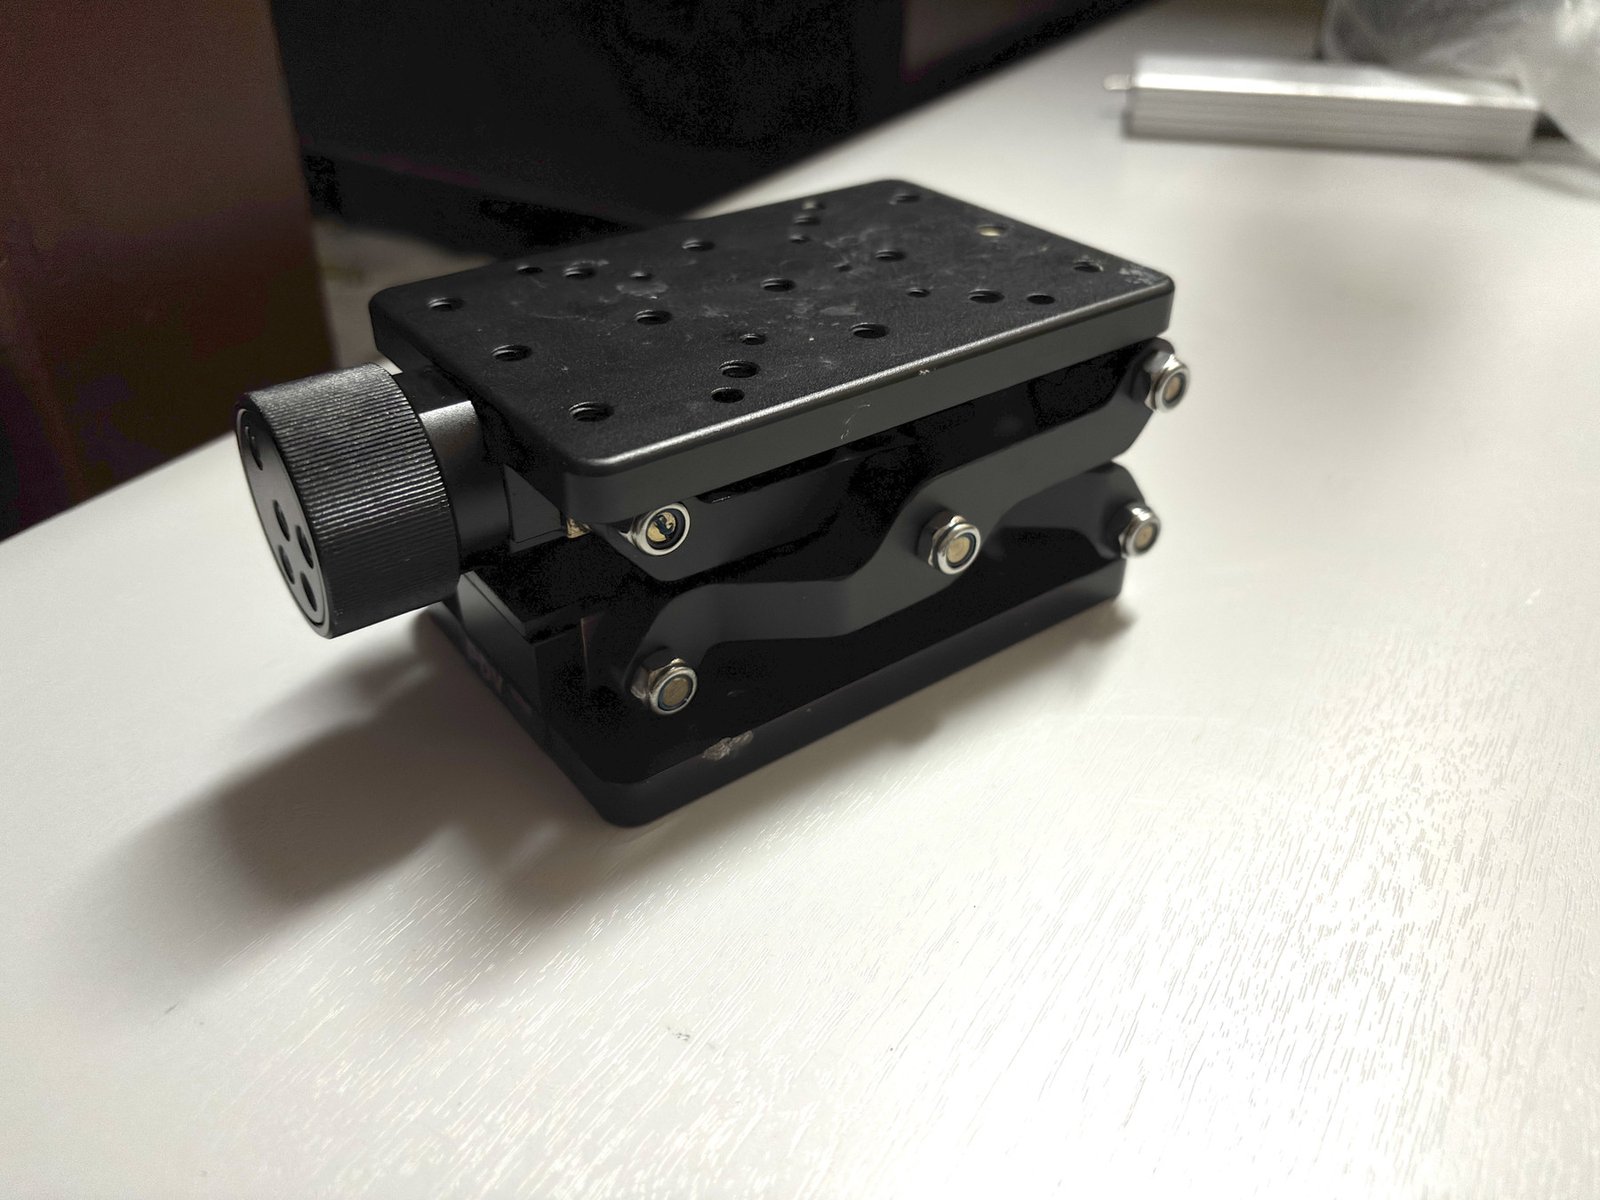
A platform for up-and-down positioning is installed on the rail. The adjustment is very smooth and precise. I bought it on AliExpress, but I don’t know the exact name or manufacturer. Unfortunately, I couldn’t securely attach the platform to the rail using bolts, for example. So I use putty or plasticine; it hardens quickly and holds the platform securely.
— About preparing crystals for shooting —
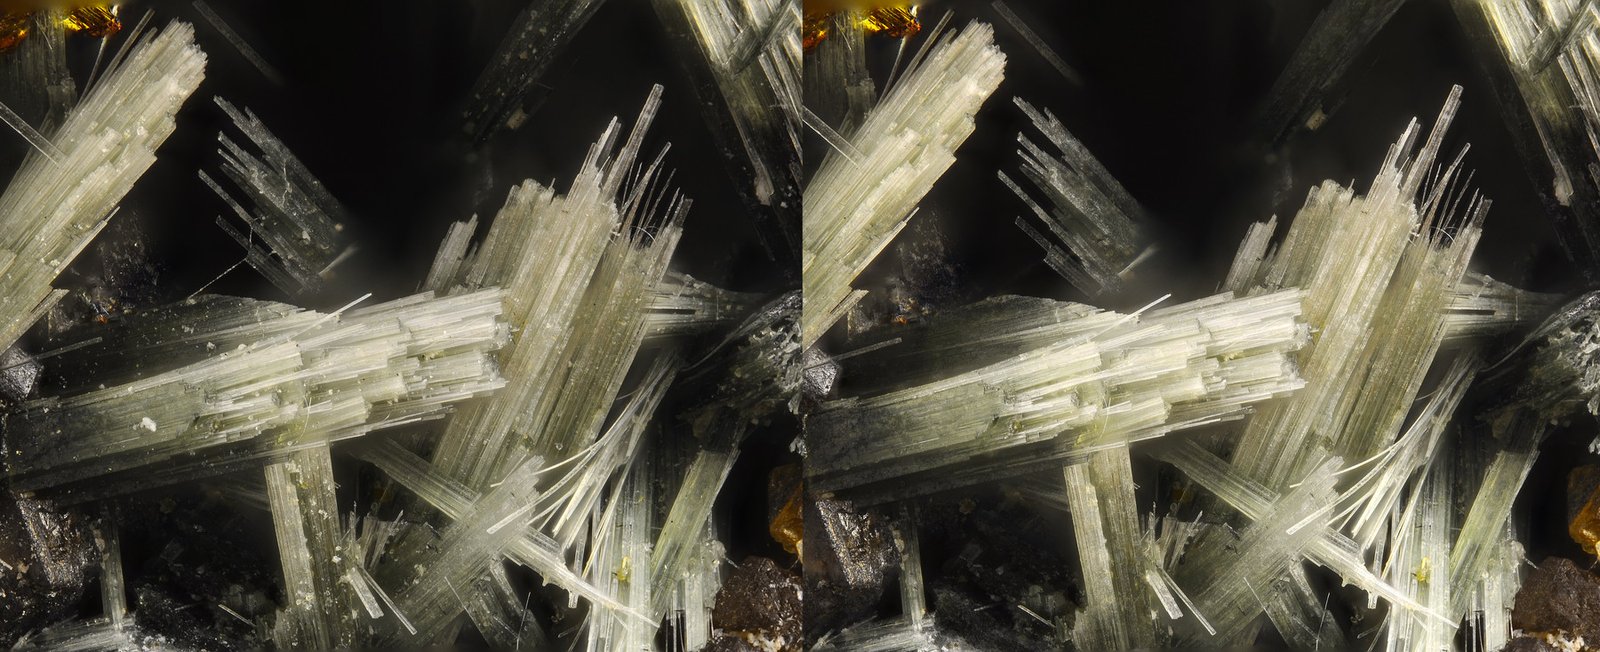
Here we’re talking specifically about photographing minerals. At first glance, minerals appear clean and perfect without magnification, but upon zooming in, we see that they’re covered in dust, the degree of contamination varying.
If the mineral’s strength and chemical composition allow it, you can clean it with a soft brush and water. Sometimes I also use isopropyl alcohol instead of water.
Also, if the mineral has little dust, it can be removed in a photo editor.
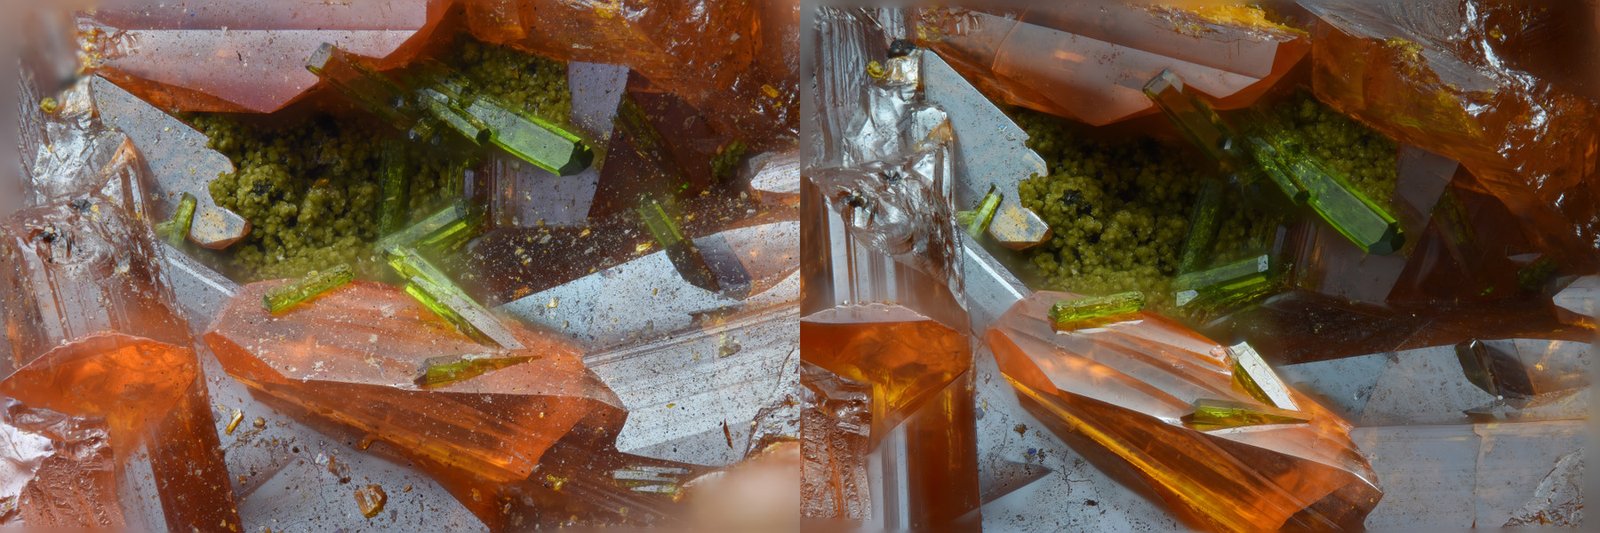
Below are some example images: before and after cleaning with water and a brush, as well as before and after removing dust in a photo editor.
— Lighting setup and diffusion —
Even if you use the best camera and optics, this doesn’t guarantee perfect photo quality. Overall quality and even the detail in a photo greatly depend on how you set up the lighting for the shoot. Here’s what’s important:
How well the light is diffused. The softer the light, the better the quality. In the photo below, you can see how I diffuse the light. Each lamp is fitted with two plastic yogurt containers. A plastic plate placed over the lens is also used for diffusion. It’s important to note that I don’t point the lamps directly at the sample itself, but rather position the light so that it’s as non-directional and soft as possible.
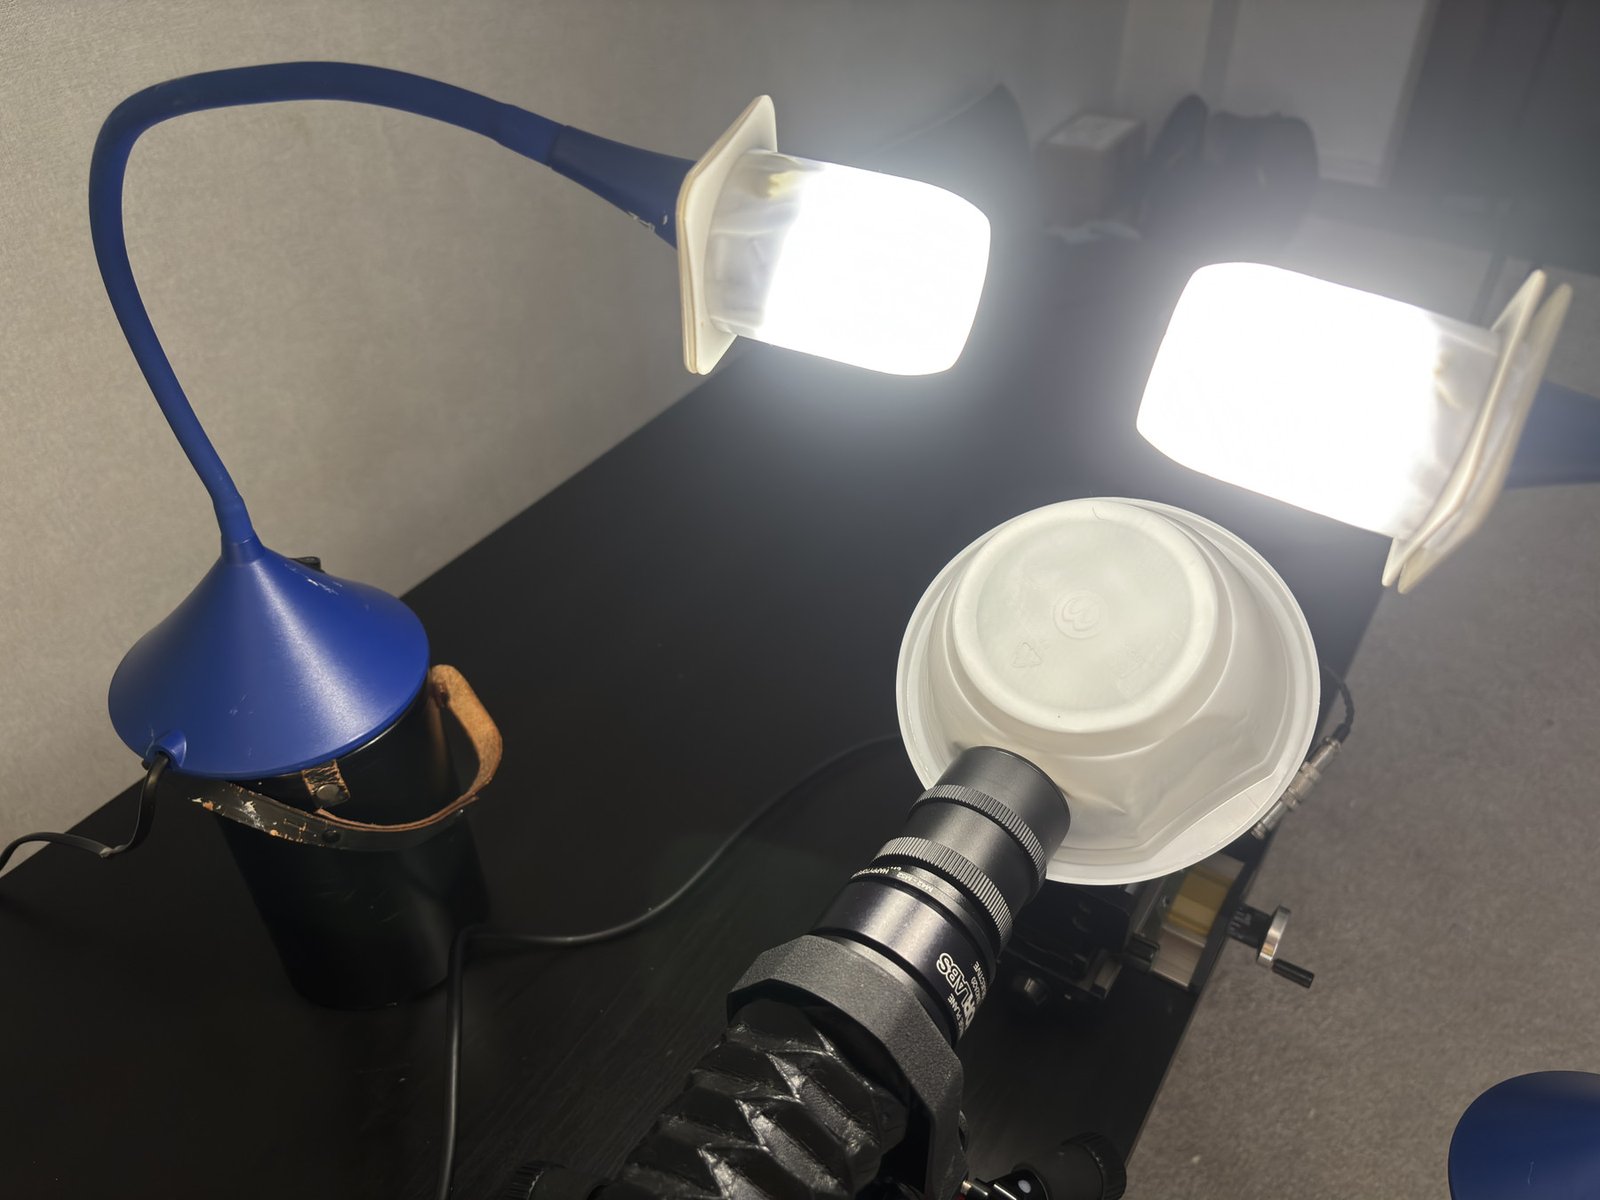
In the case of photographing minerals, from my experience I can say that the detail of the image somehow depends on the direction of the light on the sample being photographed, or more precisely, at what angle the light is reflected into the lens from the subject. Depending on this, the images sometimes turned out with pixel-by-pixel detail, and sometimes a little blurry.
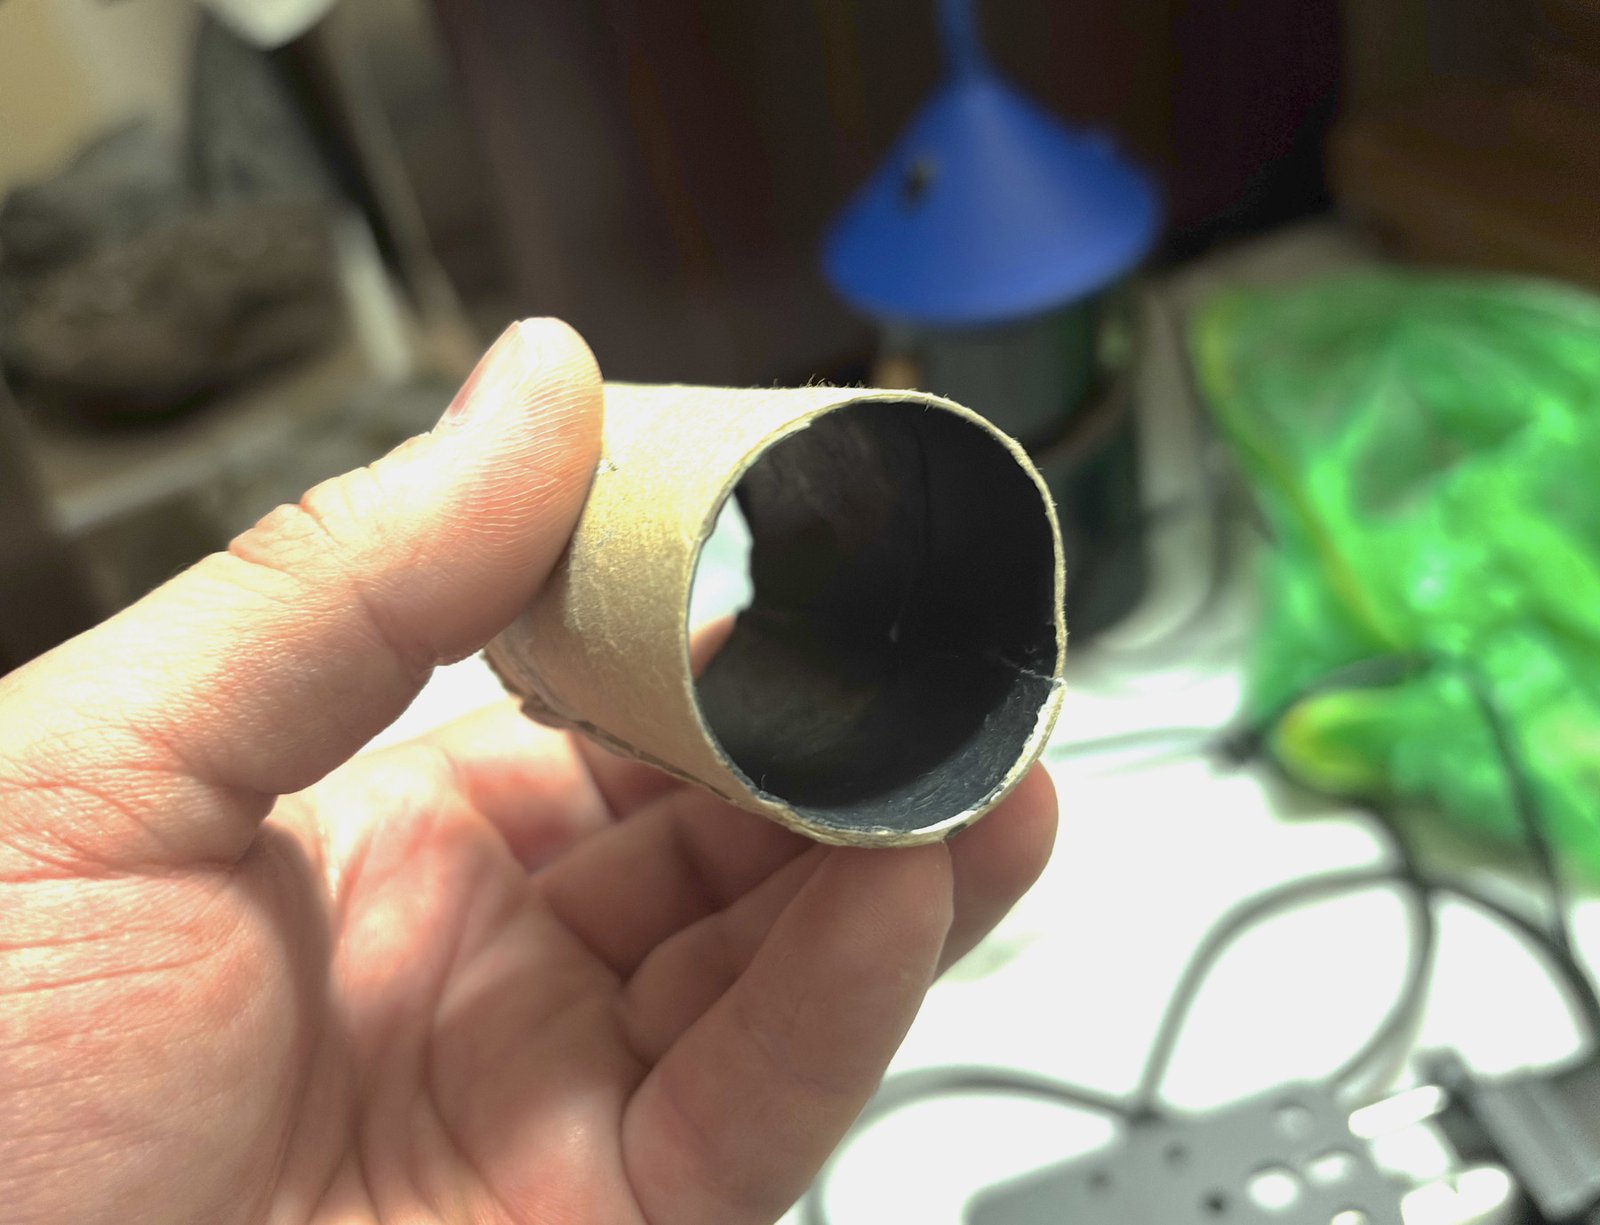
It’s important that the light you use doesn’t hit the lens directly, but rather that the light only hits the lens from the subject you’re photographing. For this purpose, I made a cardboard tube with a matte black finish on the inside. The Mitutoyo’s long working distance allows me to use this tube.
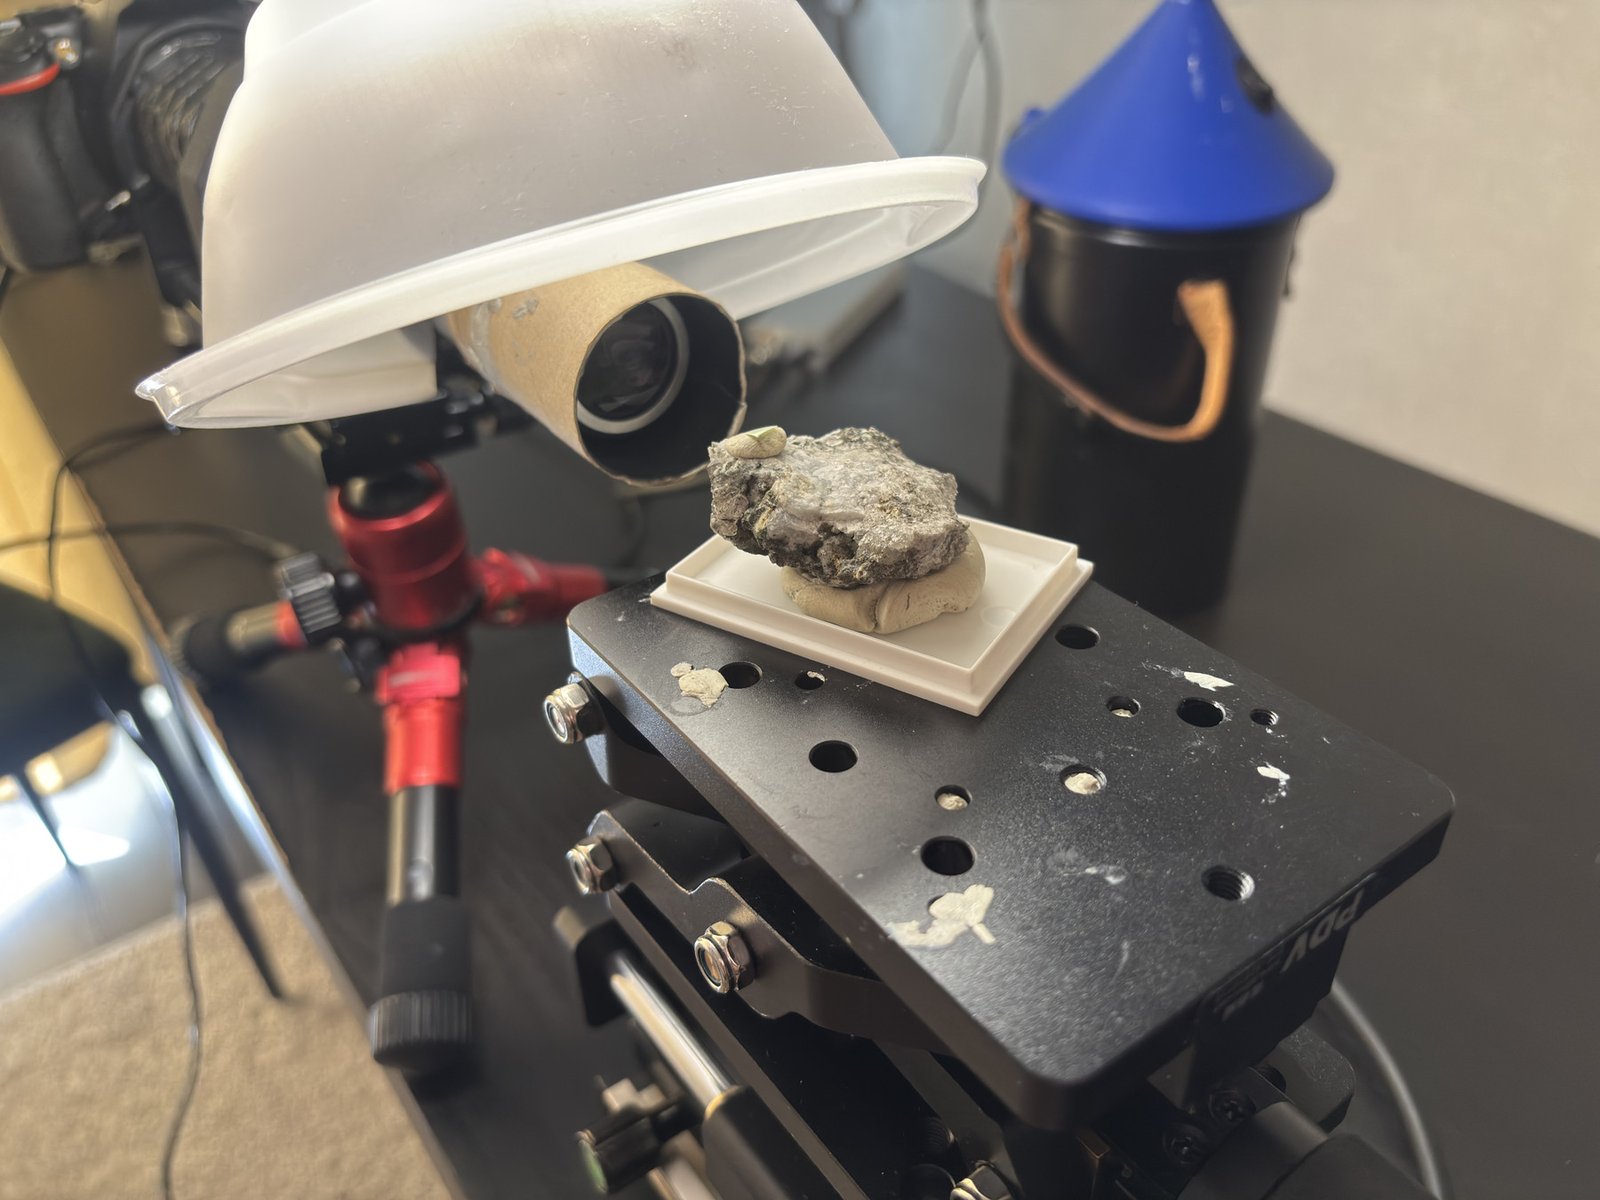
The most important rule is that the light should illuminate the subject, not the lens. Any direct light hitting the objective or tube system can reduce contrast and create haze.
For this reason, I use a black matte tube in front of the objective. It works like a lens hood and blocks stray light.
You need to shoot in a room where there is no extraneous light, so that the light on the subject comes only from special lamps with diffusers.
— Shooting workflow step by step —
Now that we’ve figured everything out, let’s get started shooting. The most important thing here is to stock up on patience. Now, here’s what we need to do, one by one:
Select the appropriate angle/frame for shooting by adjusting the proxxon and the stand for vertical positioning.
I use a single shutter speed for shooting – 3", and based on this shutter speed, I adjust the lighting so that the frame isn’t too dark or too bright, adjusting the distance of the lights to the subject. During this adjustment, of course, you need to take test shots to understand the quality of the resulting images.
Set up WeMacro. I’ve already described how WeMacro works and how to set it up. In my case, the program is already set to a 3" shutter speed, and I don’t constantly adjust WeMacro when photographing different samples; the camera always uses the same shutter speed.
For 10x, I use 2um for each frame. This is sufficient, although it takes a long time, but you can be sure of the detail in the resulting frame.
Make sure there’s no vibration. This is perhaps another key characteristic that affects image quality. Even if we look at a frame in live view, we likely won’t see it jumping around due to vibration. However, if we zoom in to the maximum in live view using the “+” button, we’ll see the frame jumping around. This indicates vibration, and such conditions are unsuitable for shooting, as you’ll get blurry images. Therefore, you need to find a location where there’s no vibration.
❗️— Common problems —❗️
1. Vibration
Even extremely small vibration can significantly reduce image quality at high magnifications. What is completely invisible to the eye may already be enough to destroy pixel-level detail.
At high magnifications, the setup becomes extremely sensitive to even tiny movement. A vibration that would never be noticed in normal photography may already affect sharpness here.
Possible sources of vibration include:
movement of cars or trucks outside.
footsteps from neighbors.
building vibration.
subway or train movement nearby.
floor movement.
touching the table or setup.
camera shutter shock.
rail movement before stabilization.
cable movement.
desk vibration from typing or movement.
air conditioning, fans or other nearby equipment.
-
any small environmental vibration that transfers into the setup.
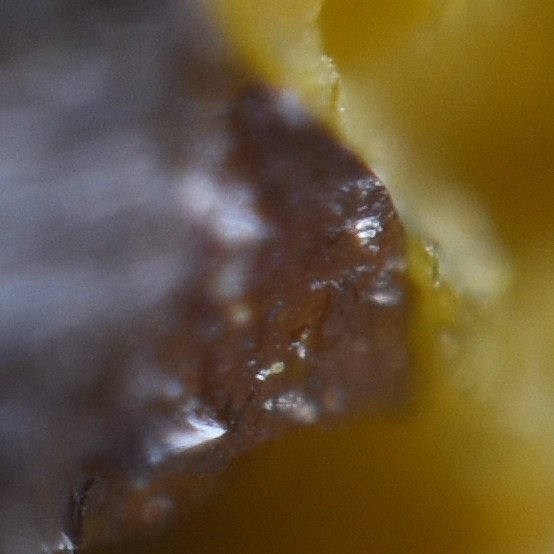
This isn't a blurry photo due to vibration. There was no vibration when taking the photo. 225% increase. 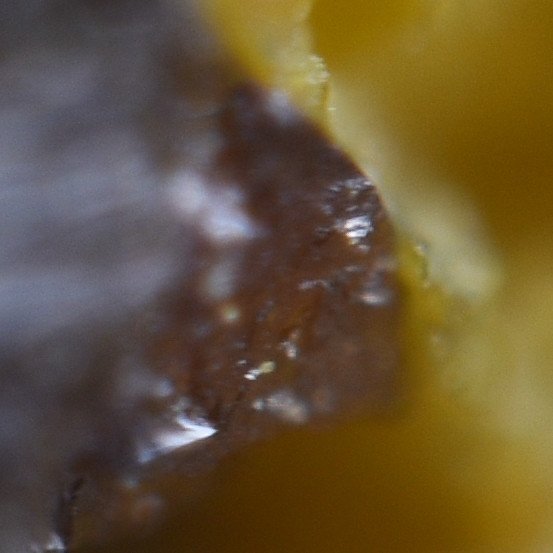
This is a blurry photo. If all the photos in the stack were like this, you wouldn't get good photo detail. 225% increase.
To minimize the effects of vibration, or rather, to eliminate it completely, I photograph at night, when there’s no vibration in the surrounding area. You can also go out of town, away from roads.
2. Dust on crystals
Dust is one of the biggest problems in extreme macro photography. At 10x magnification, particles invisible to the naked eye become highly noticeable in the final image.
Dust may appear:
on the mineral itself.
on reflective crystal faces.
on the background.
inside the optical system.
Before shooting, I usually inspect and clean the mineral carefully. Even then, some dust often still has to be removed during post-processing.
3. Reflections inside adapters
Any reflective internal surface inside extension tubes, adapters, bellows or optical components can reduce image contrast.
Stray reflections may create:
lower contrast.
haze.
loss of microdetail.
unwanted bright artifacts.
To reduce internal reflections, I try to use matte black surfaces inside the system and avoid shiny internal parts whenever possible.
4. Harsh light
Lighting is one of the most important parts of extreme macro photography. Light that is too hard often creates unpleasant highlights, harsh reflections and makes focus stacking more difficult.
Strong direct light can:
hide crystal texture.
destroy subtle color transitions.
create blown highlights.
increase stacking artifacts.
For this reason, I usually prefer diffused lighting and carefully control the direction and intensity of light.
5. Too much magnification
Increasing the distance between the sensor and the optical system can increase magnification and reduce the field of view. However, more magnification does not always mean more detail.
At some point, image quality may start to decrease:
detail can become softer.
contrast may drop.
diffraction and optical limitations become more visible.
The goal is not maximum magnification, but the best balance between field of view, detail and image quality.
— Focus stacking and final processing —
There are dedicated photo stacking programs, and photo editors also have dedicated stacking features. Dedicated programs include Zerene Stacker and Helicon Focus. They offer different stacking methods. Stacking is also available in Adobe Photoshop and Affinity Photo. From my experience, Affinity Photo does the job best. There will be a separate article comparing stacking in different programs.
Next, the photo is processed in any photo editor, adjusting brightness, saturation, and other parameters. I use Pixelmator Pro.